Published on: November 2, 2021
Your Genie garage door opener travel limits are the programmable settings which allow you to adjust how far your garage door travels up or down. If your limits are not set properly your door won’t open and close correctly. If your garage door is only opening partially or won’t fully open, you may need to adjust the “up” travel limit. If your garage door will not close entirely or stops halfway, you may need to adjust the “down” travel limit.
When you install your Genie garage door opener, you will first need to set the up and down travel limits.
- Do not operate your Genie garage door opener from the wall control before the limits are set or severe damage to the opener could occur.
- Before programming your Genie garage door opener, make sure there are no objects or persons entering the area of the door while programming and operating.
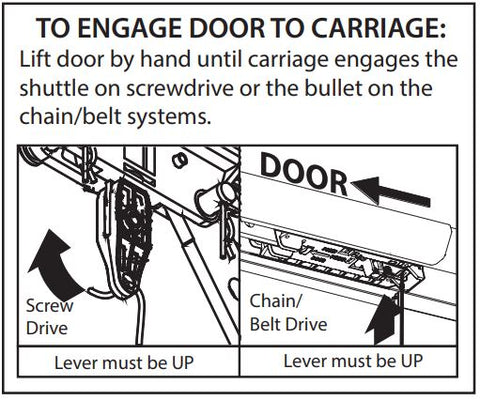
- The carriage must be connected to the turnbuckle before setting the limits. See below image.
- Do not set limits with the battery backup attached. AC power must be connected to the opener when setting limits for proper operation.
- The carriage should be locked to the opener. The garage door should rest somewhere between open fully closed and open. Do not begin setting limits when the door is fully opened or closed.
- Each step in the below programming process has a 30 second time limit. After 30 seconds, both LEDs will illuminate red indicating time has expired. Restart the step as many times as necessary to complete programming.
- You can find further detailed instructions on how to set your garage door opener travel limits by checking your owner’s manual here or watching this video.
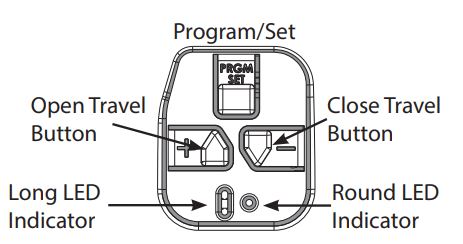
Programming Button Layout:
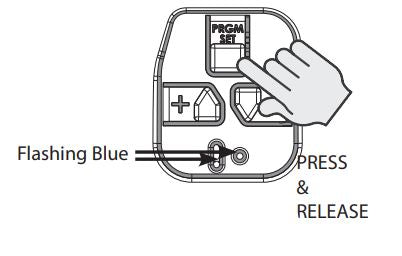
Programming Genie Garage Door Opener Down Travel Limits
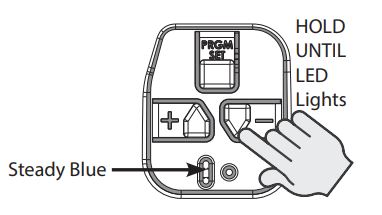
Step 1: Press and hold the DOWN arrow button.
- Long LED will light BLUE.
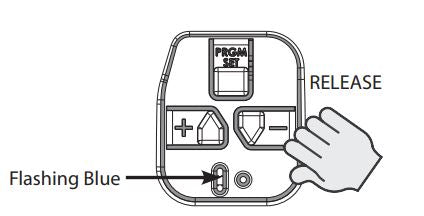
- Long LED will flash BLUE.
Step 3: Press and hold the DOWN arrow button until door is fully closed.
- Use the UP arrow button if door closes too far. Use both UP and DOWN buttons to adjust close travel as necessary.
- Door should rest on the floor until the weather strip is compressed enough to seal along the width of the door. Damaged doors or uneven floors may not seal properly. Repair these conditions to achieve a proper seal. DO NOT compress seal so much that the door will bend or buckle.
- Both LEDs will flash BLUE then go out. The DOWN limit is now programmed.
Programming Genie Garage Door Opener Up Travel Limits:
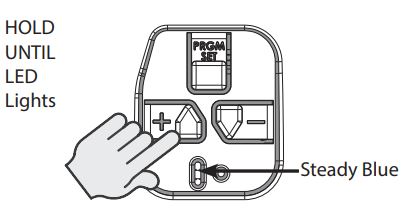
Step 1: Press and hold the UP arrow button.
- Long LED will light BLUE
 .
.
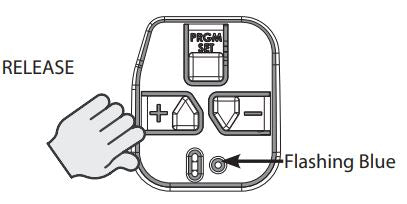
Step 2: Release UP arrow button.
- Round LED will flash BLUE.
Step 3: Press and hold the UP arrow button until door is fully open.
- Use the DOWN arrow button if door opens too far. Use both UP and DOWN buttons to adjust open travel as necessary.
SECTIONAL DOOR UP LIMIT: Door should fully open so that door seal is even with door header. Do not adjust so much that the door will bend, buckle or stretch door spring cables backward. Stop carriage short of the opener powerhead.
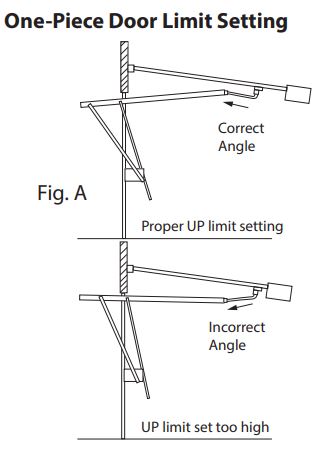
ONE-PIECE DOOR UP LIMIT: Door should fully open so that the door arms will be in line and push forward and up on the door. Door damage can result if up limit is set too far back and door arms are angled downward pushing against the natural travel direction. Fig. A
Door should fully open so that door seal is even with door header. Do not adjust so much that the door will bend or buckle or stretch door spring cables backward.
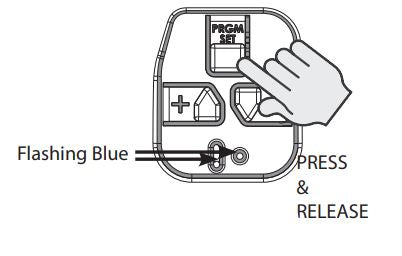
Step 4: Press and release the SET/PRGM button
- Both LEDs will flash BLUE then go out. The UP limit is now programmed.
For further questions, please reach out to Genie customer service at 1-800-354-3643. Also, check out your Genie garage door opener owner’s manual here. A video detailing how to set limits can be found here.


49 comments
My genie powerlifting 900 is not keeping the raise and lower limit settings. A few days after programming the door will not raise all the way up and then when it closes and gets to the floor it opens back up
@Fidel – Please contact our customer service for assistance at 1-800-354-3643 for assistance. We will be able to help you with the limits of your garage door opener.
Having trouble finding settings for up down travel limits on genie garage door opener
Model ic250
@James Denny Jr – Thank you for reaching out. Based on your description, it’s possible that the carriage may be worn or stripped, which could be causing the limits to drift over time. However, additional troubleshooting may be needed to determine the exact cause.
To assist you further, we recommend reaching out to our Genie customer service team at 1-800-354-3643. They can guide you through troubleshooting steps and help identify a solution.
@Andy Wappler – Apologies for the delay in responding. I understand how frustrating this issue must be, especially after replacing the circuit board and wall switch. The behavior you’re describing suggests that further troubleshooting is needed to pinpoint the exact cause. Our Genie customer service team would be happy to assist you with step-by-step guidance—please give them a call at 1-800-354-3643. They’ll be able to walk you through potential solutions and get your opener working properly again.
Thank you for your patience!