
Published on: September 5, 2018
Every homeowner wants to save money, and one of the biggest ways to cut costs on any home improvement project is to perform the labor yourself. Today’s homeowners can save significant funds by performing simple projects on their own, earmarking those savings for more complicated projects best left to the professionals.
Upgrades to the Garage
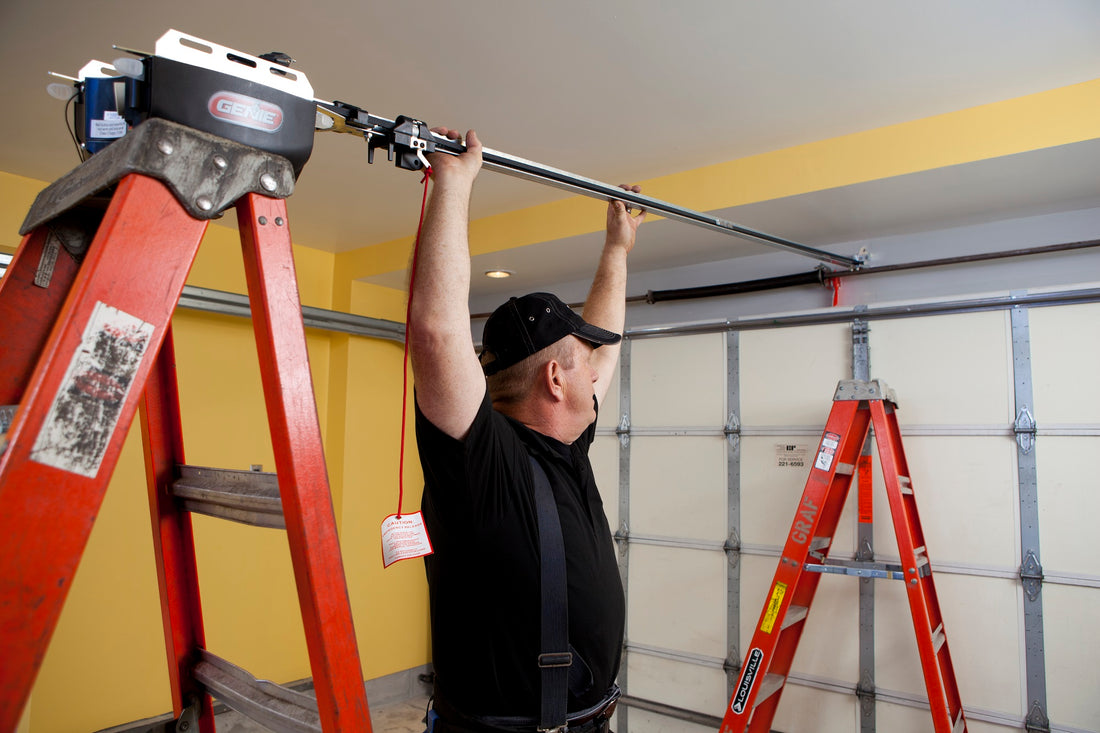
Homeowners looking to make updates to their garage often look to the garage door opener as a good place to start. Garage door openers typically last 7+ years of continuous service, but may need changed out if the homeowner upgrades technology, the opener motor malfunctions for any reason, or the homeowner simply wants an upgrade. Genie® sells a DIY-series of openers at many major retailers across the nation (find a Genie retailer near you). The Genie DIY-series is designed to make installation a simple and straightforward project that can be tackled by most DIY-enthusiasts, but there are instances that require a professional.
Factors to Consider
Homeowners purchasing a new garage door opener should consider several factors before making a decision on a professional install or a DIY install.
- Time – Installing a new Genie garage door opener normally requires 2–4 hours, but can be significantly longer or shorter depending on the complexity of the installation. If you are simply replacing an existing unit, in most cases the existing hanging hardware can be saved and used for the new unit. This cuts down on the project time, as well as the level of complexity. On the other hand, a brand-new installation requires stud-finding, and wiring, all of which will take more time than a simple replacement. If you have a limited amount of time to allot to this project, it may be better to call in a professional installer.
- Level of Expertise – Genie garage door openers require basic carpentry and electrical knowledge to install. Most of the tools required are basic hand tools that most homeowners have at their disposal, but if you do not have the tools or are unfamiliar with basic construction principles, it is recommended that a professional installer be hired for the job.
- Amount of Assistance – Installing a Genie garage door opener is typically a two-person job. There is some lifting (<40lbs.) and maneuvering required to correctly align and mount the unit on the ceiling. This is most easily accomplished with the assistance of one or two helpers. If you do not have anyone to help you during the install, it may be better to hire a professional installer.
- Door Adjustments – In some cases the garage door may require additional adjustments before an opener can be safely installed. A garage door that does not operate smoothly when manually operated may cause issues later on. It may put extra strain on the operator and affect the reliability of the system. If your door doesn’t seem to operate smoothly, it is best to call a professional installer who can make any necessary adjustments to ensure proper and safe operation of the door and the opener.
Some Genie retailers offer installation programs for garage door openers, or you can hire a Genie-authorized dealer to perform the installation. Check with your sales representative to decide which route is better for your particular application, or use the Genie Dealer Locator to find a dealer near you.
DIY Install: Now What?
Once you have considered your options and decided to go the DIY route, you may be wondering “What do I do first?” Luckily Genie offers a host of product support resources, including detailed videos, clear installation instructions, and over-the-phone troubleshooting to make your installation project as quick and painless as possible. Explore our videos on YouTube or our website and download owner’s manuals by visiting our online literature library. Review the product support resources specific to your model of opener, and take some time familiarizing yourself with the installation process prior to starting any work.
Pre-Installation
The first step to installation is to review your application and ensure you have all of the parts required to complete the job. Your Genie opener comes equipped with the parts and supplies needed for installation in most garages and on most garage doors; however, additional parts and supplies may be needed to customize installation in certain garage and garage door setups.
If your installation requires any of the additional items listed below, contact your local Genie Dealer or call Customer Service at 1-800-35-GENIE.
- Tall Doors – If your garage door is taller than 7' and up to 8' in height, you will need a Rail Extension Kit for the door to fully open. If your door is taller than 8’, a professional garage door opener will be required for your specific installation.
- Limited Header Space – The header above the garage door where torsion springs are mounted must provide enough space to mount the header bracket. If there is not enough space or you are unsure, you will probably need a piece of 2" x 6" lumber to span across wall studs.
- Finished Ceilings – The area overhead where the powerhead will be mounted will require a piece of perforated angle to span across beams of trusses.
- Safety Reversal – The Safe-T-Beam® system must be mounted no more than 6’’ above the floor and near the garage door track. It must also extend far enough off of the wall to avoid any door hardware.
- Electrical Access – An electrical outlet must be within approximately 3' of the point where the opener will be installed. If one does not exist, you will need to contact a licensed electrician.
- Door Condition and Balance – Prior to installation of a new door opener, perform a preliminary check of all associated door hardware, including tracks, springs, hinges, and rollers. Replace any damaged parts. Operate the door manually and check the balance of the door by manually lifting it to the halfway open position and releasing it. The door should not move or move very slowly. If the door is out of balance, call a service person for repairs. Warning: DO NOT ATTEMPT TO ADJUST SPRINGS OR THEIR ATTACHED PARTS!
- Remove Extraneous Hardware – Remove all ropes, t-handles, and locks connected to the garage door before installing your new opener. Closed loop lifting handles with no protruding parts can remain.
Installation

Tools and Safety
The Owner’s Manual for your opener contains intuitive, detailed instructions for installation. Additionally, an installation poster is available for each model of Genie opener designed for homeowner installation. The poster contains a comprehensive tools list that provides an overview of all of the items needed to complete the project. The basic safety equipment required for this project is nothing more than a pair of work gloves and a set of safety glasses for each participant.

Parts Organization
Your Genie opener will have a series of hardware bags that are color coded for easy reference. Clear, blue, orange, yellow, and green bags correspond to the same-colored instructions on the installation poster. Follow the instructions for each sequential hardware bag prior to moving to the next step in the process. This ensures a smooth assembly process and ensures no steps are missed.
The last steps of hardware installation involve the assembly of the lights and lenses for your opener module and the connection to electrical power. Once you complete the hardware installation and confirm electrical continuity, you are ready to move on to the programming portion of the process.
Programming
Each Genie opener has different instructions for completing the programming and/or Battery Backup setup. The instructions are comprehensive and cover all aspects of programming and troubleshooting. Refer to your specific Owner’s Manual for more information.
Conclusions
Installing a garage door opener is a project that many homeowners can complete on their own to cut labor costs. Genie makes DIY installation easy by providing numerous installation and troubleshooting resources, an all-inclusive list of pre-installation considerations, color-coded hardware bags with corresponding installation instructions, and customizable programming options for each opener model.
Genie knows you take pride in your home, which is why we take pride in our products. Contact us today to learn more about our DIY-series garage door openers that may be right for your application.
7 comments
@Charles – You could add the Aladdin Connect Retro-Fit kit to make your garage door opener “smart.” This way you can monitor and control the status of your garage directly from your smartphone! https://store.geniecompany.com/products/aladdin-connect
Can my existing Genie Stealth garage door openers be modified to allow them to be controlled by my Apple smartphone?
Hi Israel,
After installation the turnbuckle should be at about the center point of the rail. Prior to setting the limits, the carriage should be engaged to the turnbuckle, please reference page at of the owner’s manual. https://www.geniecompany.com/data/products/genie_owners-manual_750-500_eng.pdf
Hi,
I just purchased the Genie3053 TSV and I have a question. Once all parts are assembled how and when does the carriage get engaged to the Turnbuckle.
Hi Carroll, Please try reprogramming the keypad, instructions found here: https://youtu.be/QcvU24GTh5o if you still need assistance, please call us at 1-800-354-3643.