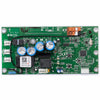
Circuit Board 38647S.S
Circuit board for chain or belt drive model openers. Use this board to get your opener back up and running quickly if you have determined your circuit board needs to be replaced.
- Compatible with models 2028
- Genuine Genie replacement part
- Requires re-programming with the new board
SKU: 38647S.S
In Stock! Usually ships within 24 hours.
ASK A QUESTION View full detailsQUESTIONS & ANSWERS
Ask a Question-
Does it come with antenna?
Yes, it does.
38647S.S Genie Control Board Replacement Instructions
PDF Printable instructions for replacing the 38647S.S circuit/control board
WARNING
BE SURE ELECTRICAL POWER HAS BEEN DISCONNECTED FROM THE INPUT POWER LINES PRIOR TO REMOVING ANY ELECTRICAL COMPONENT COVER.
WARNING
ANY AND ALL REPAIRS MADE TO THIS UNIT MUST BE PERFORMED WITH THE DOOR DISCONNECTED FROM THE UNIT AND IN THE CLOSED POSITION.
NOTE: The rail is not shown in the images, removing the rail is not necessary for this repair.
These instructions are written assuming that you will have ample room around the unit to perform this repair. Some rare instances will require removal of the unit from it’s mounting hardware and repair made on a bench or floor. Refer to your owners manual and/or installation poster for proper assembly and/or programming and carefully read and understand all warnings and cautions pertaining to your unit. Manuals/instructions can be downloaded from our websites. Refer to your unit label for website information.
Parts Included in this kit: Control board assembly, 2 mounting screws.
Tools Required: 1/4” nut driver, small common screwdriver.
Approximate Time Required: 30 Minutes.
1. Remove power from operator.
2. Press down on tabs to remove lens. FIG-1
3. Remove light bulb.
4. Note locations and remove BWC (Basic Wall Control) and STB (Safe-T-Beam®) wires. Use small screwdriver to press in on orange tabs to remove wires. FIG-2
5. Using a 1/4” nut driver or common screw driver, remove the 3 opener cover screws and opener cover. FIG-2
6. Note the locations and remove lights, transformer primary, AC power, red & black motor wires, transformer secondary, and encoder harnesses. FIG-3
7. Using a 1/4” nut driver or common screw driver, remove 2 control board mounting screws and remove control board. FIG-3
8. Install the replacement control board, harnesses, opener cover, BWC & STB wires, light bulb and lens in reverse order as removed.
9. Reapply power to operator.
NOTE: Limit settings will require reprogramming. Refer to your owners manual for detailed instructions.
IMPORTANT: Test opener functions. The door MUST reverse on contact with a 1-1/2” high object (or a 2 x 4 board laid flat) at the center of doorway on the floor. After adjusting either the force or limit of travel, retest door opener. Failure to adjust the opener properly may cause severe injury or death.
-
Free Shipping
We offer FREE shipping and handling on all orders that total over $17.99 and are shipped to a US address. All orders are shipped using UPS ground, directly from The Genie Company.
-
Genuine Replacements
Buying GENUINE Genie accessories and parts guarantees that you are getting quality OEM materials backed by a Genie warranty.
-
Support
Need assistance? We are here for you! We offer a wide range of customer support options including contact by phone or email, web chat services with a live agent, and a robust support section also located on our website. All customer care teams and services are based in the USA.